
For this ancillary project Curtis and I teamed up to explore steam bending. When we started this explorations 2 weeks ago, we both came into this physical research with confidences, as we both had this on our minds since the summer and have don’t some minor researching on this topic.

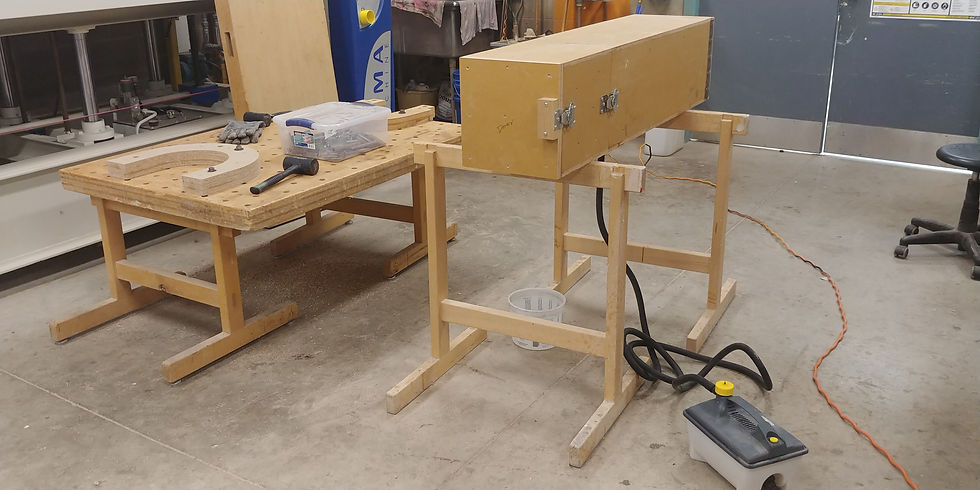
We gathered all the tools necessary to start our journey; steam box, pegged board, test forms already made, and of course milled up material we found around the shop with the straightest grain- ranging from soft to hard wood and different thicknesses.

Lee valley has a steam bending guide for free to read, that was where we first started gathering information on what to do or not to do. Two facts from the beginning of the book stood out to us, it was that we should never use kiln dried wood as the lignums are catalyzed and no matter how much steam you present it, the bonds will never break, the second fact that stood out to us is that you should avoid using soft wood to bend. But we decided to challenge those facts and put them to the test so we gather kiln dried wood from the studio and also poplar.

Everywhere you read, people will tell you that for every inch you will steam it for 1 hour so we took that rule an applied it to our first batch of wood. In this patch we had lumber that varied in thickness ½ inch – 1 ½ Inch. If 1 inch equals 1 hour of steaming we thought that ½ inch thickness would only be 30 mins, after 30 mins we pulled one out and started to bend… the results were that we found it very difficult, although we didn’t have a back strap the wood was resisting too much and we knew that isn’t right.

we thought it might be because the oven wasn’t hot enough when putting the wood in, so when it came to the second attempted we waited for 1 hour and 30 which then gave us our first successful bend.
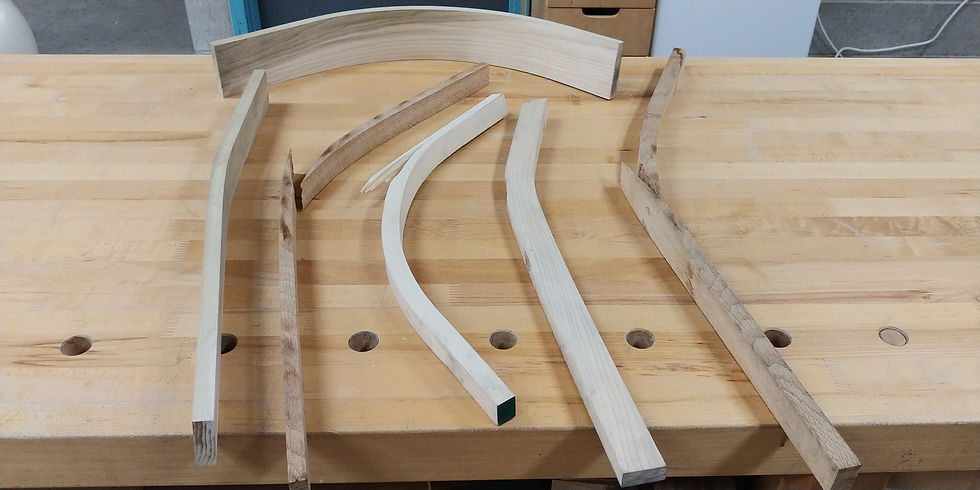
At this point we thought we figured it out, we just needed to get the oven hot enough before we start the timing. When it came to bend test 3 that was when we had our first major fail, the piece was super resilient when we tried to bend it, it even snapped on us. This left us very confused. We gave it a few more tries after but the results were the same, we realized we needed a lot more research into steam bending.


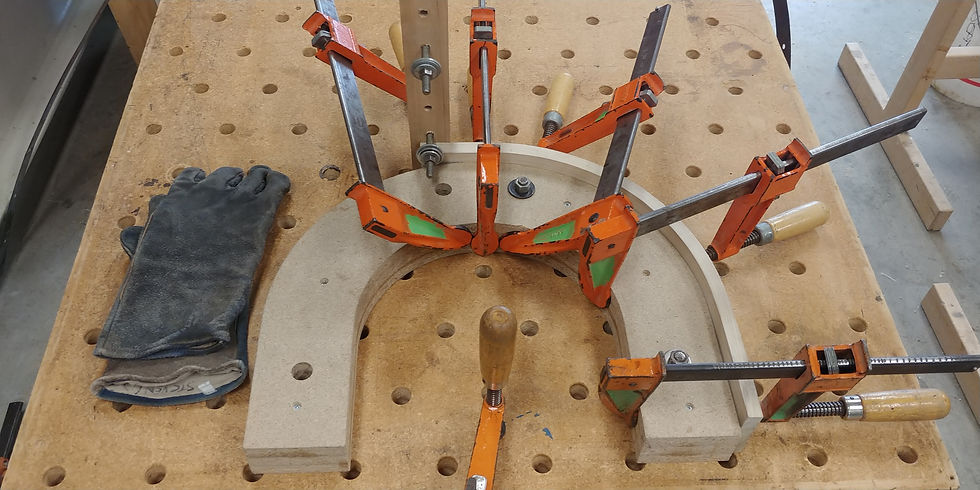
We came back the next week with more knowledge on steam bending, a guy named Engel is a furniture maker that does a lot of bending with kiln dried wood and he says that for kiln dried wood the rule is 2 hours per inch because the interior moisture need more time to build up as it starts at a lower percentage. In the next attempt we got the oven to about 60 degrees before we put the wood in, this time leaving it for 2 hours also we took the bending more seriously, instead of trying to be lazy we set up the back strap… the results were exciting a seamless/ effortless bend, the wood molded to the form. We did this 2 times and got good results.


After these successful bend it gave me confidence to try to push the limits of the bend and start to see how a 2 plane bend will work. So I made up a jig and had to change the strapping setup also.


I applied the knowledge I got from the previous bends I have experienced, I should have the same results as my previous success if I do it the same way but … the result was a bust, I said to myself it might be because the wood was faulty so I tried it again and still didn’t work. I was left even more confused.


After this try I just wanted to have some fun with bending to get my mind off of the failure so we just put a poplar in, steamed it and just started free forming it, by clapping it to a vice and twisting.


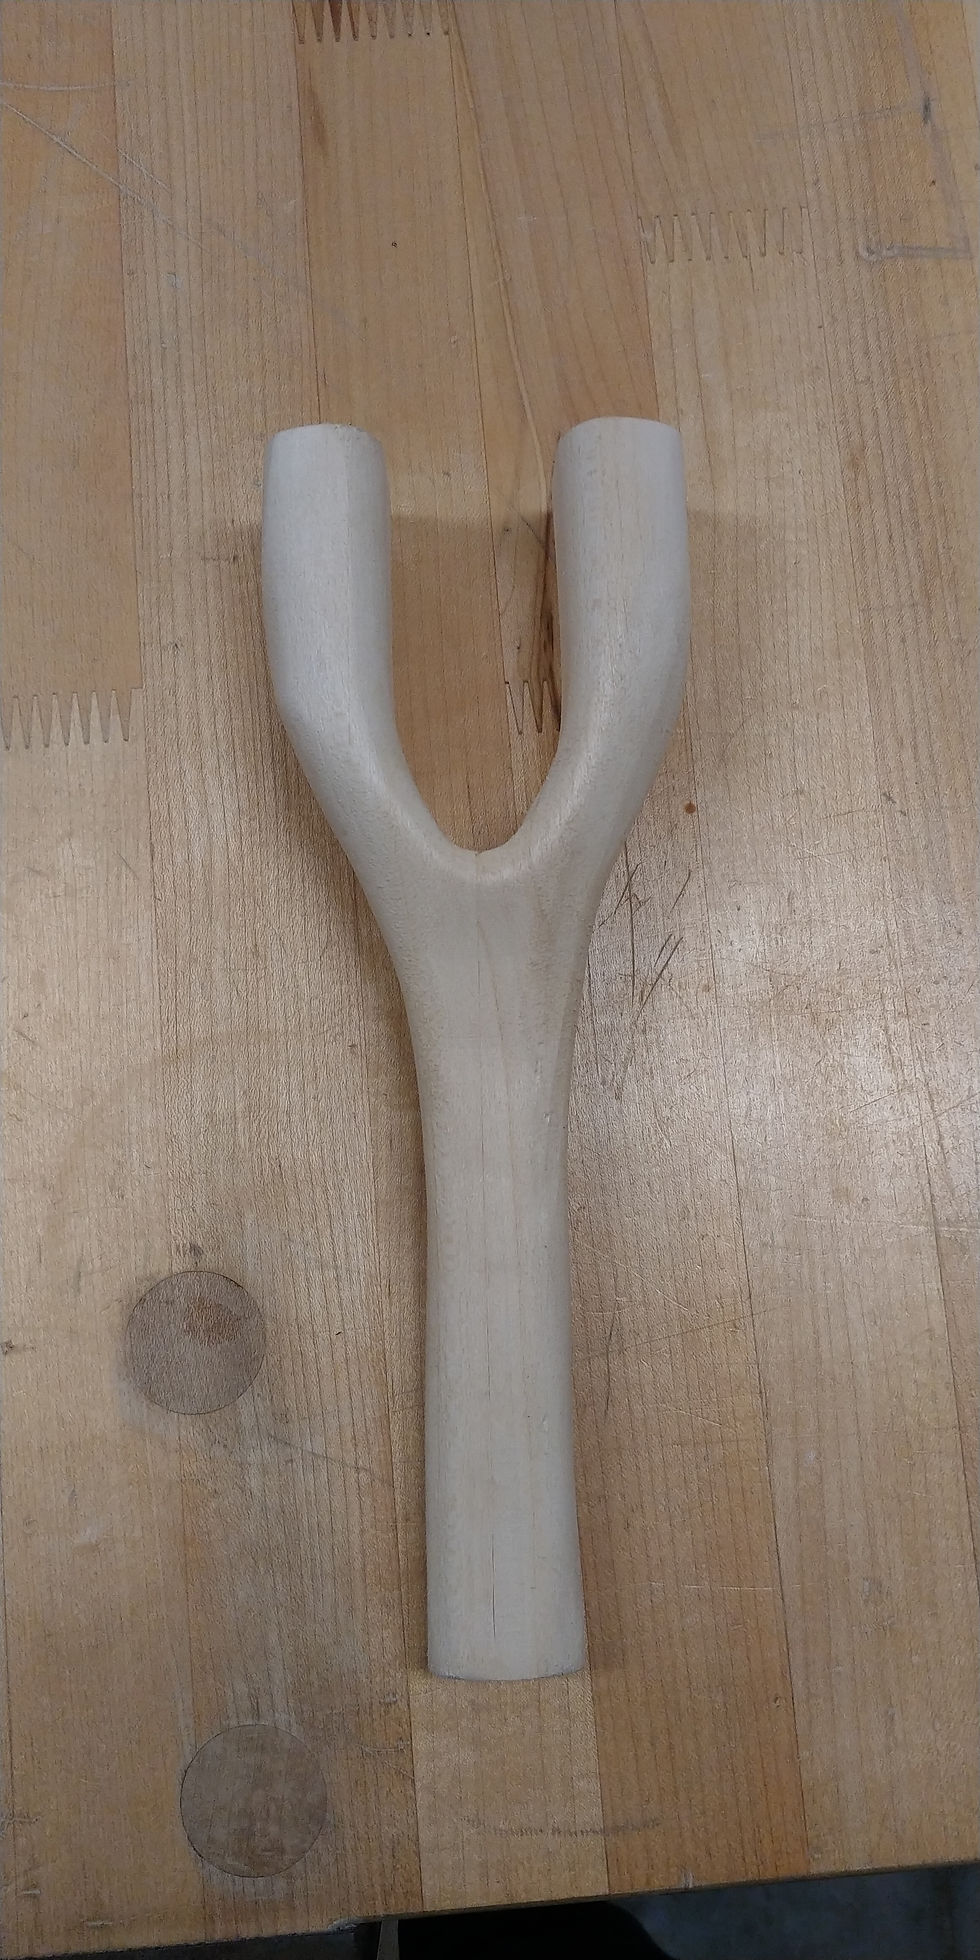
Back to being serious, I gave it one more try but this time I took more care in knowing exactly everything as it was steaming to make sure everything goes according to plan. I checked the oven with a thermostat making sure it reached its highest temperature, having off cut to check the moisture levels, making sure it reached its ideal moisture of 25-30%, Making sure the jig is set up for the correct length, and finally making sure I have the clapping sequence correct to reduce blowouts… after all this I got an almost perfect 2 plane bend, but I will say this was a successful third try now I know what to do for next time.


I worked on the Sheridan mace so there I learned bent laminated coopering and I can apply these skills to making some of the curved elements I want.


And finally I also explored this branch like detail that I am thinking of incorporating into my work as a visual reference to nature.
2 credible sources I read were.
Peck Edward C. "Bending solid wood to form" Us department of agriculture. 1957. https://www.fpl.fs.fed.us/documnts/usda/ah125.pdf. Accessed date: September 20, 2019.
Lee valley. "Steam-bending Instruction booklet." Veritas.
Comments